Tuesday, December 11, 2012

The Fastest, Best tasting, Soft Cookie EVER


I have to agree! I love me some cookies. They are fast and tasty and hit the spot. 

Cookie exchanges are always a neat way to taste and get new ideas. Now if you are one of those who we STILL LOVE but bring store bought cookies these cookies are goof proof and taste like you spent all day making them. These lovelies have a very impressive homemade quality.

Ok enough of the jibber jabber already crazy lady just share the recipe so we can make, bake and eat one!!!!

Recipe for The best soft cookies.

This recipe makes a TON of cookies. The exact amount is determined by how much dough you scoop.

2 packages of instant pudding mix 

vanilla pudding is pretty much a win all the time but if you want to make chocolate cookies use chocolate. You can use pretty much any flavor of pudding and mix and match the chips to create a masterpiece!

2 cups sugar  

 4 eggs 

 2 tsp. vanilla

2 tsp. Baking soda 

24 oz. chocolate chips or whatever chips you like. 24 oz is about two packages

We used the holiday chocolate chip mix for the holidays but you could mix in regular with holiday colored sprinkles too. 

4 1/2 cups flour (all purpose)

4 sticks of butter

 um yeah butter. You could use 1 cup shortening and 1 cup butter but the butter adds a special silky depth that makes these cookies addictive. 

Preheat the oven to 375 degrees F.

Cream your butter and sugar and eggs until fluffy. In a separate bowl mix the dry ingredients (flour, baking soda, & pudding mix) . Mix the dry and wet ingredients (eggs, sugar and butter) with the dry. Fold in the chips. 

Scoop out some dough, roll into a ball with your hand. If you want big cookies use more dough if you want a two bite cookie use dough ball the size of a walnut.

Bake on a greased or lined cookie sheet for no longer than 9 to 10 minutes. Once they are removed from the oven allow them to sit on the cookie sheet for at least one minute before removing to the cooling rack. 

The cookies will be very soft and fragile. As they cool they become more solid. Store in an airtight container, but I prefer to keep mine in my TUMMY!


Happy holidays!!!!


Wednesday, November 14, 2012

How I celebrate


Non-tradtional

My birthday falls this month. The traditional way to celebrate a birthday is cake candles presents singing blah, blah, blah. I am not so much into, all that. I even prefer we cut the cake and then let the birthday person spit on their own piece of cake...I mean blow out the candle that is in that piece. 
I don't want to hear the dreaded happy birthday or see it on my facebook. It is not the getting older aspect I just feel uncomfortable with the attention. I have a nephew who cries when someone sings Happy Birthday. I know his pain. If someone I know sings I cry happy song, sad song, it doesn't matter I am that woman in the back with a case of chronic sniffles. And have you seen your own face when you cry? SCARY!!! There is usually little children around and traumatizing a toddler is not my goal but I have seen my face crying and it is soooo not good. So nope, no birthday for me. 

Several years ago ( I can't remember how long ago, as I am getting older after all) I started a fun tradition of giving my parents gifts on my birthday. 

One year I had a local bakery make a cake and my sister served as my go-to person by picking it up and delivering it for me. 
One year they got a gift certificate to a wonderful steak house that they enjoy. My brother helped with that one.
One year they each got a gift of their own. Amazon helped with that one.
One year my Dad got a gift and my Mother got flowers. Amazon and the flower shop helped with that one.
The year my father passed  we were pre-occuppied with the funeral and I am sad to say I did not honor this non-traditional tradition I had started. 
The next year my Mother got a beautiful dress that she made look great!
The point here is not the gift, the point here is I have had a good time giving back to my folks who sacrificed so much just to have me.  
I also noticed I have really good siblings who help out whenever they can. I really appreciate that. 

Mothers and Fathers day are wonderful days to celebrate parents but I really enjoy spending my birthday giving rather than receiving. 

What non-traditional traditions do you have?


KIDS TABLE!!!!!


An adorable edible centerpiece

Are you ready yet? Thanksgiving is next week. I am NOT! I am looking for more ideas for the kids. 
The few hours before Thanksgiving dinner is really hard on the kids.
 They are all so excited and they are really hungry.  As all Moms know this is a explosive combination. A real holiday ruiner in motion. Is ruiner a word? Hmmm I will google that later. 
For now I will focus on a few things to help the kids stay out of your hair, in a good mood and out of hungers  evil grasp. 

Blood sugar issues are enemy numero uno!

Keeping children's blood sugar level in balance is important to help them stay in control of their little bodies and emotions.  Plan ahead and have some snacks ready and available to them. Here is an easy list that requires not one bit of work after you put them in the cart. Simply open them and pour in a bowl. 

Cheese sticks, baby carrots, crackers, Cheerio's, Crispix party mix, raisins (or Craisins for a holiday twist) and popcorn. 

While looking for ideas I found this really cute idea for a POPCORN Turkey.
paper bag popcorn turkey closeup Isn't that the cleaverest thing. Oh did I make a funny? Well it is clever and you could use a cleaver but a simple knife will cut open the top and allow the popcorn to be devoured by hunger stricken lil monkeys. If you would like to see the tutorial please visit http://onecharmingparty.com/2010/11/02/the-kids-table-paper-bag-turkey/

Now then all better let's play

The enfamous kid's table can be fun! I prefer it most of the time because that is where all the giggling is done and who doesn't love making canned cranberry sauce come flying out of their cousins nose because you were all laughing so hard. It is where Holiday memories are made. 
My Mother found a really fun kids table tablecloth. It has coloring and games and searches galore! We will be trying that out before the meal is served for sure. I may even pack a couple of crayons into the place settings to encourage the frolic! 
Until we are ready to sit down to color and later eat I have projects for the 9 lil hooligans who will be crawling all over the place. We have kiddos in a range of age groups from "eye rolling", "loud sigh making" "I would rather be locked in the bathroom with my iphone" 12 year olds, to a"lets play dress up" "I LOST my Blankie" "I need you to hold me for no apparent reason other than I said so, so.... why are you not holding me yet" 4 year olds. Yep it is a REAL GOOD time. And now you see why we need to keep the animals corralled.  
Boys project: Explode CRAP. Uh huh you got it. I said it. They will be doing exploding science projects. What boy (of any age mind you) would turn down the opportunity to throw that mentos into a plastic coke bottle? If you guessed NONE you would be absolutely correct. I do not think I will have any complaints from the hubs and the Uncles to help be the parental guidance with this one. 

Girls Project: Make an apron BORING! I know but they can also get involved with the explosions. The girls can score them. WHAT? DOUBLE BORING!!! Yeah I know as a kid I would have wanted to explode crap too. Hmm perhaps Barbie could aid us in the adventure. Barbie was always my go to toy to get thrown, be used as a slingshot, be a great torpedo, she can even poke out an eye with her fancy ninja fingers. But the little girls in our family are girly girls not a tomboy like me. So I really do have plans for them. Actually we may make beaded keychains, colorful t shirts, decorate our own shoes or some other little ready made craft kit I can find. I want it to be super easy and not take a ton of pre planning as the boys project (not to mention cleaning the house, packing for the trip and well breathing) will take me a while.


What will your lil monkeys be in to..Oh I mean doing this Thanksgiving?


Tuesday, November 13, 2012

Operation Giving Back


Operation Giving back

When I was younger my family had a fire at our house. Our church family, friends and neighbors stepped in to help us in our time of need. As a kid it was really unsettling. In times like these I tend to go a bit numb. Not sure if I should cry, scream, run, fight, hide or what, I simply tend to shut down. Crawl inside and watch what happens around me. I don't think as the oldest of five that I was much help with anything. All I could do is sit and watch the firemen come and go. That is what I remember about the fire. The people who helped.Some of them were people I barely knew if at all. It was amazing.  The fireman, the friends and family that stepped in. It left a mark on me. That fire made me want to try to help families who have suffered from fire and other losses. 
"I promise Mrs. Truvy, not to let my personal tragedy affect my ability to do beautiful hair!" Steel Magnolias - the original movie. Sorry that movie just pops into my head from time to time, as it did here.
 
  But seriously we have all had our share and some of us have had more than our share of tragedy and if you are one of the few who has not, well then, I am very, very happy for you. What is important is to give to share, it teaches us appreciation and restores our faith in human nature and brings us back closer to God..  
  

As part of the charities being featured this month I found two really deserving and inspiring charities to share with you today. 

Operation Shoebox


This charity is for the troops. They fill boxes with needed supplies and try to fill specific requests and needs.
For example they were in need of softball equipment, personal hygiene supplies (travel sized), and used golf clubs. 
If you don't know what to do with all that left over Halloween Candy, send it to Operation Shoebox and they will get it over to our troops! Every year Operation Shoebox will go through tons of candy that they send to our troops and would be happy to have your left overs!  

Operation Christmas Child

The mission of Operation Christmas Child is to demonstrate God's love in a tangible way to needy children around the world, and together with the local church worldwide, to share the Good News of Jesus Christ.

Many of these countries are closed to church's of any kind. This may be the only opportunity to share that love with a child. 
You can follow your box on it's journey if you donate online. You can also fill a shoe box yourself. Let your heart be your guide as to what to put in the box. If you want an idea of what has been sent in the past please take a look at their website.
We will be doing this project with our children. It is a really good experience.
Now I know some of you are saving why send it away when so many here in the states are in need. This is the good part so listen up. They serve our country as well. You don't designate where your box is sent but just know that every box is guided by God's hand to a child who needs it. 

Local idea

A fun local idea is to spoil one family in need. If everyone "spoiled" one family with food, warm blankets, hygiene products, little toys, school supplies, warm socks or shoes, hat, gloves etc...every year we would have such a happy community. So if the shoebox and Christmas child aren't up your alley "spoil" a family. Your soul will thank you.  


Saturday, November 3, 2012

Grateful: Weekend Day 3, 4,& 5

Grateful: Day 3

Today I am making Thanksgiving cards to give/send to those who we are grateful for. 
A few people in our daily lives are overlooked. These people bless us everyday without us even acknowledging their efforts and role in making our lives more enjoyable. 
A short list follows: your mail person, trash person, church secretary, sheriff, deputies, police chief, policemen/ women, Teachers, Janitors, a friend, a neighbor, Dry Cleaner, Librarian, Doctor, Nurse,DayCare teacher,  Dentist, Optometrist, Paper boy, Scout leader, Sunday School teacher, Cashier at the grocery store, the bagger at the grocery store, this list is really open to anyone who you come into contact with that you feel has blessed your day. 


We will be making cards and I am encouraging the kids to give away at least one card a day. Now they will be instructed to give the card thoughtfully and not just give it away or to simply hand it to their buddy to satisfy Mom. This needs to be an exercise in thoughtful appreciation of others efforts in your life and to show your gratitude for those efforts. 

Here are the cards I was making for our neighbor and Preacher gifts a few days ago. You can make these or something less fussy just keep the focus, you want something simple but thoughtful.


Simple card that looks like it took a awhile to make.  I designed is using elements in the Silhouette Cameo. 
A rectangle that I welded together with the turkey. The turkey and bottom fold have a small score to help them fold nicely.  I used four different colors to mix and match. A melon (the really pink looking one which is not pink at all in person), a burgundy, a deep hunter green, and a sandy tan color. Four passes through the cameo, a little weeding, glue and sign the inside and you are done! The smile on the recipients face is worth every second.  

Interested in these cards but don't want to make them yourself? They will be coming soon to my Etsy shop. Etsy Shop for CreativeCarbaholic

Want to make them yourself but don't have a Silhouette? I can send you the kit! Leave me a comment with your email and I will get right back to you.

Today's Charity: Make A Wish Foundation

Here is a list of wishes granted in 2011. Made me want to cry, such sweet little wishes.
435-moments-of-magic-2011.jpg
Thank you for stopping by today!
Best wishes in all things, to you and yours.
Carolyn

Grateful:Day 2

Grateful Day 2

America I am grateful for you and I am grateful for the opportunities we have.
America is a very blessed country. I love it. I wouldn't want my children or loved ones being anywhere but here. I am about to be brutally honest though, Americans are spoiled. Be honest with yourself we are spoiled. We have worked very hard to obtain our freedoms and our servicemen and women work everyday to assure that freedom. In many, many ways we are spoiled here in America. So many others have so very little in comparison. This happens to be a factor not only when comparing countries but also right here at home. We seldom take notice of all the many things, sometimes little things, sometimes big things, but these things are all things that we are so blessed with. We are so blessed that we assume others are as well. We also seldom realize that others would be blessed by our sharing with them. No now, I don't mean empty your purse in the hand of the nearest homeless person. I am saying there are those in our lives, communities etc...that are in need and sharing even a little of what you have, even just a kind word can make all the difference in the world to someone else.

Many people think of this time of year for charities. (I agree but please don't forget them the rest of the year.)
Everyday for the next week I am going to give you a list of common charities and of uncommon charity opportunities that you may not think of or know of. Please choose one this year if not two and make a simple donation of either your time or resources. 

Today's fun charity opportunity: Movember

Movember

This charity is so FUN!!!!!!! 
Movember is the month formerly known as November, where men and women across the globe join together to raise awareness and funds for men’s health issues. Men grow and women support a Mo (moustache) for 30 days to become walking, talking billboards, for our men’s health causes - prostate and testicular cancer initiatives.

Men who support Movember, called Mo Bros, start by registering at Movember.com. Mo Bros start Movember 1st clean shaven, then grow and groom their Mo, for the rest of the month, raising money along the way. Women who support Movember, called Mo Sistas, also start by registering at Movember.com. Mo Sistas champion the Mo by supporting their Mo Bros, organizing events, leading a team and spreading the important message of men’s health.

 You can even start entire team of Mo's and ask for people to support your team with all donations going toward the charity. Ladies there are opportunities for you as well read up on Mo Sistas. The site is hilariously full of mustache paraphernalia. It is an entire site for of styling tips, pictures and funny sayings. If you have a man you love in your life this site will both make an interesting read but help men's health.

Please Donate $5 today to my Movember Mo Sista Team.


Thursday, November 1, 2012

30 days of teaching an attitude of gratitude


30 days of teaching an attitude of gratitude

Gratitude is defined as the state of being grateful : of having thankfulness. 


This is something that I have tried REALLY hard to impress on our kids. Some days they make me proud and do something that shows they heard and listened and retained that impression. Other days they make me want to scream! They are kids. It is part of the process. I am trying to remind myself of that.  I am thankful for having children that I want to hang by their toes sometimes, I realize others are not that blessed and would love to be able to have these experiences. 

That realization has made me think a lot lately about making the month of November more than just a month of eating, gorgeous autumnal colors and the anticipation of Christmas. I plan on taking the next 30 days to really teach gratitude to our children. I will be learning along the way too. After all you never really learn something until you teach it.

Thankful tree

Today is November 1st and as the day after Halloween we are going to have a Halloween Hunt. We have a hunt after every holiday. This hunt includes the kids going with me room by room and removing the holiday decorations with me. It makes the chore of putting the holiday things away a little less tedious and less depressing. : )

After our hunt we will be putting up a Thankful tree. Using paper bags from the grocery store we will construct a paper tree on our wall. This tree will hold all of our leaves. Each leave will contain something that each child is grateful for. Each day our children will pick out a leaf and write what they are grateful for and then we will hang them on the tree.  The point is to have the kids think about all of the blessings that they have on a daily basis. 

After our tree is up we will be taking a treat & card over to our neighbors and Pastor. We have great neighbors and Pastor and we want them to know we appreciate them very much. 


Tuesday, October 30, 2012

I am a pumpkin

I am a pumpkin

gorgeous pumpkin floral arrangement
Yes, you read that right. 
I am a pumpkin. I am a warm colorful person, full of goo and since I have had four children, I am apparently fruitful.
 I am also sorta shaped like one of those crazy shaped gourds you see everywhere this time of year but let's not speak of such things....shall we?!

But most of all after being exposed at church to a sweet little story I feel more like a pumpkin than ever.

Our Pastor shared this sweet little story during children's service Sunday morning. I hope your little ones enjoy it as much as our children and I did. 

Being a Christian is like being a pumpkin

God picks us from the patch, brings us in, and washes all of the dirt off of us.
He removes the top and scoops out all the yucky stuff inside.
He carves a new smiling face and puts his light inside of us to shine for all the world to see.


Thank you for sharing this with us Bro. Dennis.


Thursday, October 25, 2012

Halloween Books

Halloween MUST Read Books

In our house we have a couple of absolute Halloween favorite books to read. 
I also have a few that I thought were pretty good and they aren't all for little crazy wild monkeys. There are a few for you too!!!  NOTE: Some of these books are just imaginative fun not necessarily Halloween. I see Halloween as a time of creative imaginative fun, not necessarily the gruesome holiday it is seen as. So some of these can be read anytime like over Thanksgiving break : ) 

Kids Books ( the innocent ages 1 to 80):

Five Little Pumpkins by Brenda Dyer 
  This a poem actually made into a very  very short  little book but don't let that fool you into thinking it won't make your little ones bored. All of my kids love this one. Ok the oldest two are 11 and 12 and boys so they don't love it more than once a holiday anymore but my girls will read it everyday several times a day. 

Last week the youngest came home with this silly little glove. I thought what in the world did they make at school today! She grinned so big and said, "MOMMY!!!! (running toward me from the school with glove on hand) It's the 5 punkins!" This adorable glove was made at school with one of the best teachers in the world. I didn't ask if I could use her name here so I will call her Mrs. Clock because it rhymes with her real name : ).
 
Mrs. Clock took a black knit glove and hot glued orange pom poms the very tip of the fingers and top that off with a small piece of bright green pipe cleaner stem on top of the pom pom pumpkins. They can use the glove to practice counting and to act out the story.  That simple, cute, fun glove has increased the reading of the Five Little Pumpkins in our house about 50%. CUTE!!!!!! Thank you Mrs. Clock, the best 1st grade teacher in Texas!


Vunce Upon a Time by Vivian Siobhan 
  This sweet little book seems scary because it hs a vampire but this little guy is a vegetarian! HE loves veggies Mom! Love that part but then he also LOVES candy too.... so  I guess  I am picking my battles and am of the mind that if the dessert gets them to eat the veggies DO IT!!! But back to the book. Dagmar is the main character and is adorable. This is one of my favorite Halloween books. It is a very fast read and most children will be able to connect with Dagmar's troubles.  Not at all scary.

We are waiting for these two books to arrive. They look absolutely adorable!
Pumpkin Town! Or Nothing is Better or Worse than Pumpkins. By Katie McKy


and
Fancy Nancy....Halloween or Bust! by Jane O'Connor  


For the older crew (ages 9 to 16):

The Fairy Tale Detectives (The Sisters Grimm, Book 1) by Michael Buckley  
A story of two little girls ages 9 and 6 who have lost thier parents in a mystery way are led to find thier family has a long kept secret. This book is mildly scary and could be upsetting for young ones so I would advise not for those under 9. Now if you love the TV show Once upon a time, you are going to love these books. I read this one aloud with our oldest son and now our youngest son is reading it in class. Really imaginative story and keeps the kids guessing.  There are several in this series of books and we have not read them yet but plan on it.

The Bad Begininng, Or Orphans (A series of unfortunate events, Book 1 by Lemony Snicket and Brett Helquist   This book was read aloud to my 3rd grader in class and I understood it was great. That of course came from my 3rd grade son at the time. He could not wait for the movie because the book was that great! I have not read the book but I have seen the movie. The movie had a few scenes that left me uneasy so this is probably best for the older crew again. 


Octavious Grimwood's Graveyard Guide by Rod Green    This book was purchased at a school book fair by our youngest son. He is 11. The coffin shape is very cute and the graphics are scary but not too over the top. The book is a collection of very short stories from around the world as well as brief descriptions of things such as werewolves and skeletons. As if a kid needs those described they do live under thier beds all year long....Our son decided without us knowing to buy this book. He just had to have it and had his own money that he earned so he bought it. I am not saying it is not appropriate or that it is a bad book. It is simply not one I would have bought as a woman for my child. He however loves it and had my hubby reading a short story about a ghost of a man who died climbing Mount Everest, just last night. He asked his Daddy if that story was real or not and so my hubby read it. As he read all I had to say to that was, "Of course it is real! People who are crazy enough to climb a snow covered mountain without fitting air are bound to die!" LOL Well they smirked at me and read on. Needless to say Mt.  Everest is not making my bucket list. : )

For the big 'uns (age 15  and up):

If you haven't noticed I have not listed the two series of books that I bet everyone is expecting here. Twilight and Harry Potter. Well I haven't read them. I have seen the first two Twilights and when it is available on Netflix or something might watch the third just to see what the hub bub is all about but the magic was lost on me. Sparkly vampires....hmmm not likely. Found the scene of a bunch of adolescent boys half dressed a little disturbing too. And as for Mr. Potter, I have watched the first 30 minutes of the first movie and can I say SNORE! So with that being known I did not read any of those books either. Just not my style I suppose.
Now on to the good books. : )

Unenchanted by Chanda Hahn This is the 1st in another series of books. The books seem to be titled in one word. Descriptive and yet not.  This story also will be loved by those who like the TV show Once Upon a Time.   A young girl in high school comes to find out why her fathers side of the family has mysteriously passed and why she has been forced to move constantly. Teens and tweens will connect and enjoy this one. I really likes this one too.
Grimm's Fairy Tales by Jacob and Wilhelm Grimm  The darker side of fairy tales. With the intent to preserve Germanic Folklore the Bro's Grimm collected the peasants stories. May not be suitable for the younger kids as Cinderella has no fairy godmother  and sometimes happy endings just don't happen.  The older kids will like the twist on the stories they know and just might learn a little something about human nature. One of my favorites.

Broken Shell Island, The Witches of West Shore by Dyla Moon  An interesting book that I read. A teen or tween would enjoy this book as well. The main character, a young lady, finds herself pushed overboard in the middle of the ocean in the middle of the night with only her suitcase to save her.  She awakes to find she is on an island she only knows from a old set of books her grandfather gave her. Her magical journey includes fairies, murderous witches, gnomes and a boat load of imagination. Very creative book which I just found out is the first of a series that I must know go search out and read myself. : )


Amazon is where I go to buy most books online. Please feel free to use my link to obtain great gift cards for Howling Good Halloween books!

Shop Amazon Gift Cards - Perfect Gifts Anytime

Tuesday, October 23, 2012

Spooky Pillow fun

Spooky Pillow Fun

If you want just a little spooky fun that you can change out and store with ease, try a pillow case.
I decided to make pillow cases for our living room couch pillows.

I have four pillows. This works out well because I have four children.  One would think oh so this allows one per child and everyone is happy. Well let me know when you wake up from la la land....oh you are awake?
All Mommy's know this rule is a happy thought but nearly never reality, just because there is enough for everyone to have one it does not mean that everyone will only have one nor will they all be happy about it. So I will eventually add more but for now only 4 pillows is allowing my 4 children to learn to share and think of others. They are praised when they offer a pillow without being prompted and they are beaten severely with a wet noodle when they are stingy.
Now I ask you who doesn't love Casper the friendly ghost?  Love him.

Fabric remnants $1 each. Really easy to make. Right sides together Sew all the way around and shove that pillow in. 

Finished pillows.

For fun detail I tried a wonky blanket stitch to attach the word BOO. I might go and and continue the stitch throughout to create a web-like appearance. 

With the inexpensive fabric remnants and available choices it makes these pillows affordable, easy to make and fun.  Add a kit kat bar and that screams Happy Halloween to me.
I have a couple of different designs that I liked. If these survive and I add more pillows next year the kids can design their own, but for now MUTHA KNOWS BEST! hee hee


Sunday, October 21, 2012

Poison Apple Plaque

Poison Apple Plaque Centerpiece


Remember this lovely young thang? 

Delightful isn't she?
Well she has always been one of my top two villians from Disney Cartoons.

In this scene the Evil queen is making a poisoned apple for Snow White.... so thoughtful isn't she?! 

Ok well she is not nice and the apple is really a not so nice thing but what a great prop for Halloween. Right? Yeah I thought so too!
So here is my version.....
These two items came from Dollar Tree. $2 plus vinyl and about 30 minutes to apply the vinyl.
I won't fib the oodles and boodles take forever to weed out. Don't know what oodles and boodles are? They are the little bits inside the letter o, a, & e. See the "holes" in those letters well when you cut vinyl there are little bits of vinyl that you have to weed out or pullout in these letters. When the letters are small it is really time consuming but the results look great.

The tray has the spell that the Evil Queen used to turn herself into the old hag. 
 
The apple is a foam apple that I added a wonderful skull filigree to for effect. *


I placed this in the center of the dining room table and asked our kids to try and figure out which movie this line came from. I figured the poison apple would give it away fast but SURPRISE!!!! It stumped them.
They focused on the words more than anything else. They had a few giggles until I asked them to look at the whole tray including what was on it and they FINALLY proved that they are my "Disney movie loving" spawn and guessed Snow White....

The downside of giving birth to smart children

Oh, did I mention they informed me it was a red apple not green? Uh huh, they did and yep I knew but I liked the way the green oozed over the top (see the pic above) of the apple, plus I like the green color and well there was the fact that the Dollar tree only had green.  
So simple it is scary..... but fun.

Thank you for stopping by and please share your thoughts with me. Thank you!

*Vinyl graphics made from Silhouette Cameo and I am happy to cut them for you.
The skeleton filigree $3 each and the spell (weeded out) $12, (without weeding) $9
please leave a comment to order.

Wednesday, October 17, 2012

Halloween Count Down

Our kiddos are counting down until CANDY KICKOFF 2012!!!!
Part of that kick off is counting down the days. I have chosen to do a fast simple and extremely inexpensive countdown plaque. 

The supplies simple.
A Dollar Store Tray or plate $1.00 can't beat that!
Black GLOSSY Vinyl  or Chalkboard Vinyl
Dry Erase Marker $1.00 at Dollar Store or a Chalk pen from Elmer's

Vinyl Cutting machine- I used a Silhouette Cameo (LOVE IT). If you don't have a vinyl cutting machine I am happy to cut vinyl for you.** 


I washed and dried my tray and let it air dry for a day to be sure the plastic was completely dry. While that was drying I cut out the designs on my vinyl. I laid out the pieces on the try to ensure a good fit and to arrange and rearrange a few times until I was happy with the look. I then applied the vinyl and cracked open my dry erase marker in a shade of green almost too dark to read. TIP: Do NOT buy a dark shade and honestly you can use any dry erase or Chalk pen that is not permanent on this glossy vinyl without problem so it might be a good idea to use one you can actually see.... : )


Ahhh we live and we learn right? But the kids love it and we are counting down the days.


**for this project the charge would be $5.00 for glossy vinyl/ $6.00 for chalkboard vinyl these prices do not include shipping.  FREE shipping if you order before October 23rd.


Tuesday, October 16, 2012

Devilish Delights

Devilish Delights

So are you enjoying the season thus far? ME TOOOO!!!! 
In fact we have had some beautiful fall days recently and I have nothing to complain about.

This devilish craft was my first Halloween project this year.


I love our children. They all have their own spirits and personalities. Good days and bad but what I love the most is that they take jokes and tricks as good as anyone. And by the way they can give it back just as good so watch out you tricksters......

With this in mind I took a traditional photo and put a fun spin on it.
I took a simple silhouette of my child and added horns.  Okay, they already had the horns but they are naked to the non-Maternal eye aka if you aren't their Mother you can't see them.


It was fun seeing all of their reactions to their own silhouettes. I added a rectangle and oval to the background of the silhouette for added appeal. 
I liked the texture of the green and I even liked the color but it screamed Christmas rather than Halloween soooo I changed it to a solid black. However I have plans for this with the green at Christmas time. Yep it's a teaser. You will have to come back to see what I do in a few months.


After I created the image in Photoshop/Illustrator I printed them out in a 8.5 x 11" size. Then I grabbed a few flat 11" x 14" canvas panels. I wasn't sure I wanted to be stuck with just one color so I opted not to paint the canvas. I am a multi-purpose person. I need things to in my home to be multi-purpose as well. This way I can use these canvas' any time of the year in any room no matter what. So I needed a way to add interest and color without being permanant.

My mind went to washi tape, scrapbook paper and to just leave it alone. However, I don't have any washi tape and lets face it I don't want to cut up or fold my scrapbook paper just to turn around and take it off and have to throw it out. Now you could leave the canvas it's white color but I really think it needs something to make the silhouette pop.  I had all but given up and went blah, vanilla, plain but then as I prepared for another project it hit me! FABRIC!!!!!
 In the fabric section I found a few fabric remnants as I didn't have anything devilish enough in my own fabric stash. ; )   I found these great pre-cut pieces for under a dollar. They are about 18" x 21".
Love them! So many options, so many opportunities.

After washing the fabric to remove any sizing and "sitting on the shelf, being held and fondled by others" funk, I streched the fabric over the face of the canvas similar to the way you would make a canvas panel.
Tuck the corners for a nice flat look. I tried a stapler. That is not going to work. Glue gun? Nope don't want to ruin the canvas or the fabric. So I was back to my trusty packaging tape, the clear variety.


Make a your fold as flat as possible without having to cut the fabric. This way you can reuse the fabric for another purpose of need be.

The fabric is attached to the canvas and the front is smooth and ready 


 Affix the print to the face of the canvas with four pieces of double sided tape (one in each corner) or you can use what I lovingly call "snot dots". They are actually called Glue dots, but if you have ever used them you know why I call them this.
You are now ready to hang your creation.

Need a photo made into a silhouette?

If you are interested in having a devilish silhouette made of your children or husband or granny or dog or whomever I am certainly happy to offer that service to you. Your image will be created and sent to you via email for printing as you like. The charge for this service is $6.00 per image or $20 for 4 images.
 Please email me, via the contact section, to order. 
Thank you for stopping in today. I will have more Halloween fun for you tomorrow.


Wednesday, October 10, 2012

Monster in the house!!!!

Monster in the house!!!

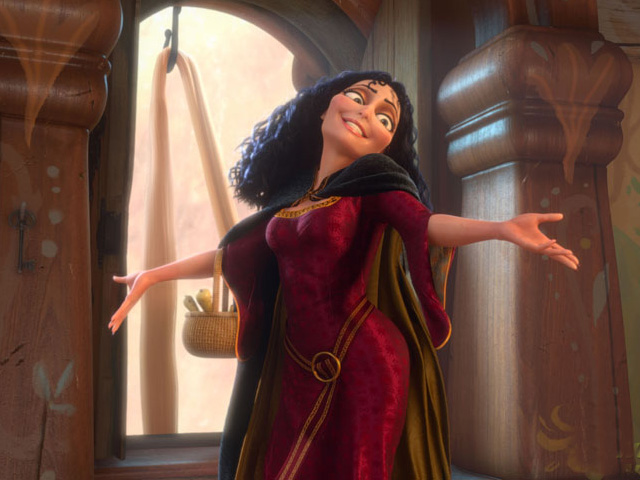
This project was very easy and fun. The idea is the monster is in the house and is stuck. Think Alice in Wonderland Growing too large to fit inside the Rabbits cottage. 

In our instance it was Frank N. Stien, he visits us in one way or another every year. This year our treats made him grow so much he can't get out.

Want a monster stuck in your house?

Here is how we did it.
Project list:
Front Door
Table Cloth- of the plastic throw away variety

Scissors
2 paper plates
black construction paper
white construction paper
Tape- Note: in the picture you will see invisible tape, I changed half way and used shipping tape the clear stuff. It holds much firmer and the changing weather does not take it's toll as much.
 Oh darn it... I forgot you also need a stapler.

Open up your tablecloth and start taping at the top. I taped along the top edge of the door where the tape will not show. Now if your door fits very snugly you might want to wrap it around the back side so the tablecloth doesn't rip off every time the door is opened or closed. I lined up one edge of the tablecloth with the edge of the tablecloth so I only had to trim one side. I left the trimmed edge to the hinge side of the door.
Tape good but there is no need to cover the whole edge. Just focus on areas that might catch or pull loose and get in the way of the hinge or the door lock and handle. I didn't have to trim any off the bottom it is a little long but it is ok for my purposes. Don't forget to trim around your door knob. You will want to be able to get in and out : )


I placed the eyes first. Why here? Why at this angle? Cuz... that's right just cuz. Don't worry about it being symmetrical or just right. He is squished against the door it won't be perfect, hence the fun.

To make your eyes take your paper plate and flip it over to show the backside. Now take the black construction paper and cut out two large black circles. I had folded the black construction paper in half, top to bottom. Then I cut a big circle out. I used three sheets. The extra eyeball shapes are used to make the nose holes.
I then took my scissors along the edge and cut into the circle making a comma shaped cut out. This creates the little glint of light in his eyes.
Tape them along the ridge of the plate, that area where the food sits, just before it flares outward to the edge.
Now to make the eyelids take the left over plastic tablecloth and measure it out to cover the plate top to bottom and side to side. I didn't measure. Simply pull the plastic over the plate and then cut. You will need two pieces, one for each eye. Then take the plastic and accordion fold it (also known as fan or Z fold). Now no worries again it is not meant to be perfect. Take the stapler and staple the folded edge on each side. You will have one long folded piece of plastic with the edges stapled on either end. Wrap the middle section of the folded plastic over the top of the plate. Tape it on the back (really the front) to hold it in place. Then tape the ends to the back (really the front) of the plate. This forms the eyelid. I then just pulled and lightly tugged and scrunched the plastic until it looked like a wrinkled eyelid.
You can vary the look in his eyes by varying the placement of the glint in his eye and how the eyes are arranged. Try them a few different ways before you stick them up. The plastic can tear with the tape when being pulled off. To attach the eyes, I took the shipping tape and cut four pieces. Then I rolled each piece on itself placing one sticky side to the plate edge. Repeat three times along the edge of the plate. Then press the plate firmly to the covered door.  Frankie can see!
The nose and lips are made the same way the eye lids are. Use the plastic tablecloth and guesstimate how much plastic you will need to make the nose size and lip size you want. The nose is approximately the same size as the eyelids. Once you have folded and stapled the plastic use the tape to attach the nose to the door. As I mentioned before, I used black construction paper and cut two ovals for the nose holes. Then attach the nose like I did the plate. I used the tape and attached the stapled edges first and then the center top and bottom. Fluff the nose out a bit, then shape the nostrils by pressing a rounded shape. Then insert the nose holes made of black paper.
Oh this looks like it takes for ever by my writing but it is a very fast project. Under 30 minutes. REALLY!!

The teeth are next. I used white construction paper and cut out 6 monster teeth. Again let your imagination fly. Mine are rounded off squares and some really chipped edges. I actually only used 5 teeth. The odd looked better. Play with it and decide what you like best. This is what pleased my girls the best. I again use the shipping tape to attach the teeth from the back.
Once the teeth are in place you can make/attach the lips.  Again I took the plastic and eyeballed how much I would need to cover the teeth. Accordion fold and staple the plastic. I attached the top lip first. Starting with the left side stapled edge. Using the rolled tape, place the corner of the lip. Then spread out the plastic over a portion of the teeth. Attach the right side corner of the mouth wherever it looks good. Then tape the top center and bottom center of the lip in place.  For the bottom lip I taped the left side stapled edge just under the top lip at the corner of the mouth. Then I taped the top portion about a quarter of the way along the edge and then again about three quarters of the way on the bottom lip and the right corner to give it shape. Then I fluffed out the plastic a little but smooshed it back down. This way he didn't have bee stung lips.Then I taped the bottom center in place just like I did the top edge.
I called my girls over to look and told them he wanted a big smooch. They giggled but puckered up anyway.

The hair sort of evolved. I used the scarps from the eye balls. What you are seeing is three pieces or remnants of construction paper used for his hair.  I placed the remnants together and taped them together on the back and attached with the rolled shipping tape. I attached this last after I had the rest of the face attached. You could also make bolts, furry eye brows, eyelashes, a scar, a big mole, whatever you like to give him more personality.
Sorry for the glare on the glass but you can sort of see how he looks smooshed. You could take this to the next level by making feet and hands and placing them in random places on top and sides of your house or windows, to complete the Alice in the Cottage effect.If you do send my pictures I want to see!!!
 Have fun and enjoy this frightfully fun season!


Thank you for stopping by and I can't wait to share the next project with you!